CLASSES

Beginners Photography Course
Weekly Classes - Coventry

Lightroom Photo Editing Course
Weekly Classes - Coventry

RPS Accreditation
Online Mentoring for RPS

Photography Mentoring
Monthly Assignments


To Shoot Your Products or Services
Professional photos for your product, property, services and company


Table of Contents Show
In the bustling e-commerce scene, how your items look can play a massive role in convincing people to buy. That's why getting good at product photography setup is super important if you want to make it big online. Setting up your product photography game right not only makes your stuff look fantastic but also gives you an advantage in a competitive field. Whether you're working with sunlight or studio lights or figuring out the best camera settings and tripod stance, nailing every little bit helps produce stunning product images that catch the eye of potential buyers.
This piece is a detailed tutorial for those just starting out, showing you how to set up for top-notch product photography. You'll understand why e-commerce product photography is critical, get to know the essential gear for eye-catching product shots, and learn what to do before you get started on the product photoshoot. Moreover, this tutorial will dig into how to carry out the photoshoot with methods like employing a white backdrop for clean images or digging into close-up shots for intricate pictures.
Once you've taken the photos, you'll get handy advice on polishing them up, plus ways to keep getting better at your product photography skills by trying out inventive ideas. By exploring these topics, you'll arm yourself with the know-how to boost your product shots to the level of professional product photography, unlocking your imagination in the bustling world of e-commerce product photography.
In the dynamic realm of e-commerce, product photography emerges as a pivotal element that significantly influences consumer behaviour and sales performance. High-quality product images serve as a key driver of customer engagement and play a critical role in building a solid brand presence. This section explores the multifaceted importance of product photography in online retail environments.
A compelling product image can make or break a customer's decision to purchase. Studies, such as those conducted by Etsy and Shopify, reveal that nearly 90% of consumers consider the quality of product photos extremely important in their purchasing decisions, and products with high-quality images see up to 94% higher conversion rates. These statistics underscore the direct correlation between the quality of product photography and e-commerce success. Customers rely heavily on visuals to assess products, given the absence of physical interaction. Clear, detailed, and attractive product images help bridge the gap between online browsing and the tactile shopping experience, thereby enhancing consumer confidence and encouraging purchase decisions.
Product photography extends beyond the mere representation of items; it is instrumental in crafting and reinforcing brand identity. Consistent, high-quality images reflect a brand's commitment to quality and reliability, shaping consumer perceptions and fostering a sense of trust. This trust is crucial in a competitive market where consumers have endless options. By maintaining a consistent visual style, brands can create a recognisable aesthetic that resonates with their target audience, making the brand more memorable and likely to attract repeat customers.
Accurate and detailed product photography helps set realistic expectations for customers, reducing the likelihood of returns. By providing a true-to-life portrayal of products, e-commerce platforms can minimise discrepancies between how an item appears online and its real-world appearance. This transparency improves customer satisfaction and decreases the logistical and financial burdens associated with high return rates.
In today's digital age, visual content is king. High-quality product photos are inherently shareable, making them powerful tools for online marketing. Engaging images can be used across various platforms, from the brand's website to social media channels, enhancing visibility and engagement. Additionally, compelling photographs can attract more traffic to e-commerce sites, boost search engine optimisation (SEO), and generate more leads and sales.
The strategic integration of high-quality product photography into e-commerce operations is not just advisable; it is essential. It influences consumer behaviour, enhances brand perception, and ultimately drives sales. As the e-commerce landscape continues to evolve, the role of product photography becomes increasingly central, not just for surviving but for thriving in an increasingly visual and competitive market.

Mobile Fast Food Truck - Product Shoot
Embarking on the journey of product photography requires a robust setup, especially for beginners aiming to achieve professional product photography results. Here, we outline the essential equipment needed to get started, ensuring you have the right tools to create stunning, high-quality product images.
For beginners, the choice of camera is pivotal. While smartphones and point-and-shoot cameras offer convenience, they often fall short in flexibility and image quality under varying lighting conditions. Digital Single Lens Reflex (DSLR camera) cameras are recommended for their versatility and ability to use different lenses. Entry-level DSLR cameras provide a great balance of quality, ease of use, and access to various lenses for different photography needs, such as macro lenses for detailed shots. A smartphone camera can also be used for product photography at home if you're just starting out and don't want to invest in a DSLR camera right away or you are not shooting for commercial use.
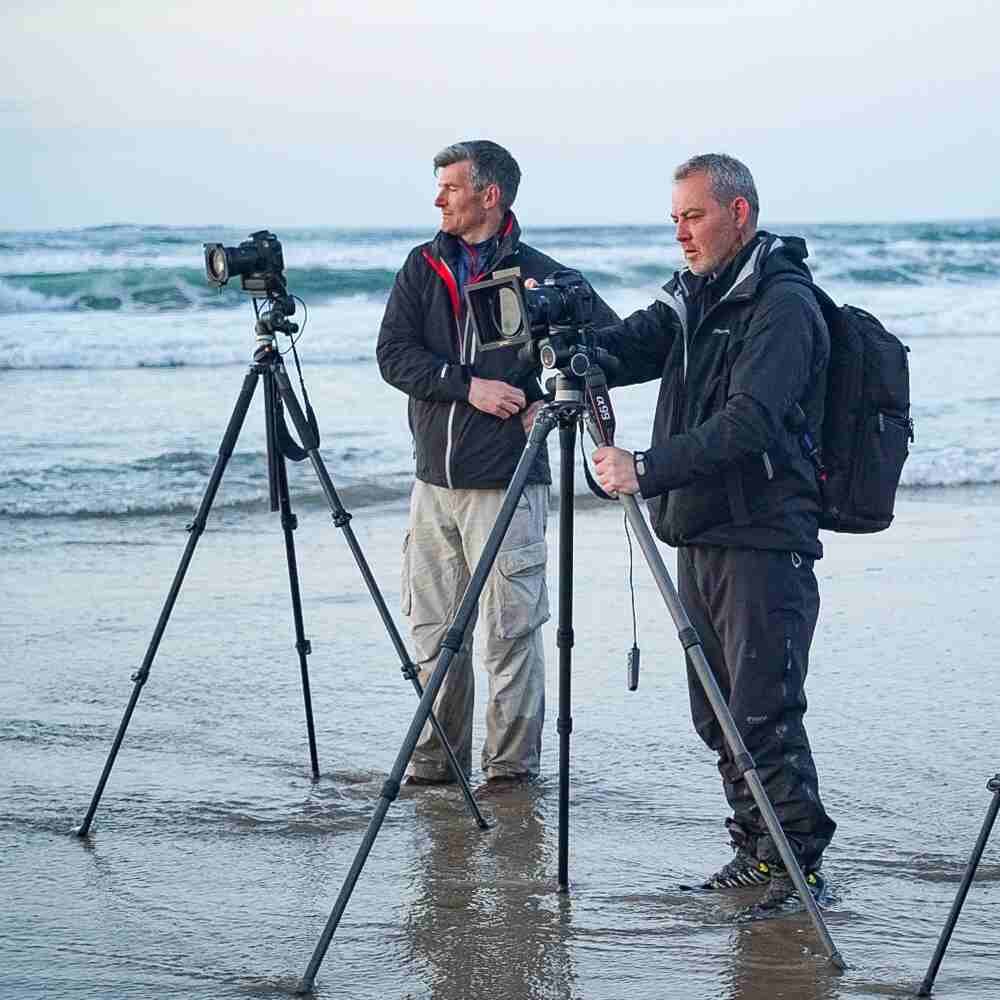
A sturdy tripod is essential for maintaining camera stability and achieving sharp images. Tripods help in precise framing and are invaluable in low light conditions or when using slow shutter speeds to avoid camera shake. Models like the Manfrotto 055 are highly recommended due to their robustness and flexibility, allowing product photographers to capture images from various angles without sacrificing image quality. Your tripod legs should be capable of getting as low as ground level and the tripod and head should be capable of being able to shoot overhead with the camera facing down. I have written various posts on using tripods on my blog page, so take a look at those and which tripods I recommend.

Shooting Overhead
Proper lighting is crucial in product photography. Beginners should consider starting with a basic two-light setup, using softboxes to evenly light the product from both sides. This setup helps eliminate harsh shadows and provides a clean, professional look. Continuous lighting kits, such as the EzyLite 4 Head Kit, are particularly user-friendly and affordable for beginners, offering a simple setup and consistent lighting. A light tent or light box can also be useful for DIY product photography to diffuse the light and reduce shadows. I prefer to use my Godox V860iii flash either mounted to the camera hot shoe but diffused and directed or with a softbox/umbrella, depending on the product being photographed. Remember you will also need a S-type Bracket Speedlight Bowens Mount and lighting stand if using the flash off camera. I have put together a list of items you may want to shop for in this storefront on Amazon
Choosing the right backdrop can dramatically affect the appearance and professionalism of your product photos. Seamless paper backgrounds are popular due to their affordability and wide range of colors. Options like Savage's 01 Super White provide a clean, distraction-free background, ideal for ecommerce product photography and online stores. For more durability and a different esthetic, canvas or muslin backdrops can be used, especially in settings where a more textured background is desired. A shooting table can also be a helpful tool to provide a stable surface for your products and backdrops. Take a look in recommended product photography equipment storefront for possible ideas.
Post-production plays a significant role in product photography. Adobe Photoshop and Lightroom remains the industry standard for photo editing, offering comprehensive tools for detailed retouching and creative adjustments. Beginners might find Photoshop complex, but it's invaluable for achieving professional-grade results. For those seeking simpler software, Adobe Lightroom offers intuitive controls and powerful editing capabilities without the steep learning curve of Photoshop. Both programs offer tools for colour correction and image optimisation to ensure your product images look their best. If you require some training on getting the best from Adobe Lightroom, take a look at my photo editing evening classes or if you are not local to me, I can provide similar Lightroom training online using Zoom.
By equipping yourself with the right camera, tripod, lighting, backdrops, and editing software, you can start your product photography journey with confidence, ready to create compelling images that enhance your e-commerce presence.
Before diving into the actual product photoshoot, photographers must meticulously prepare their workspace. This involves selecting an area with adequate room for all equipment and ensuring that the environment can be controlled for consistent results. A well-organised space not only facilitates a smoother workflow but also minimises potential disruptions during the shoot. It's advisable to have a clean, clutter-free area where the focus remains solely on the product. For those working in smaller spaces, innovative solutions such as using a curtain pole to hang backdrops can save space and cost effectively.

Lighting is the cornerstone of product photography, profoundly impacting the quality of the final images. Beginners should start with a basic lighting setup, utilising continuous lighting with daylight bulbs to mimic natural light. This setup should include key lights, fill lights, and possibly backlights to enhance the product's dimensions and texture. The key light, typically positioned at a 45-degree angle from the camera, sets the tone and contrast, while the fill light helps soften shadows. Backlighting can be used to outline the product, adding depth of field to the images. Adjusting the intensity and position of these lights is crucial; too close may result in harsh shadows, while too far could flatten the product's appearance. there are multiple lighting setups that vary depending on the type of lighting being used, power of those lights, the area and product and of course the desired affect of the light on the product. This external link to a lighting guide for product photography will provide you a good starting point with various setups.
Reflectors and diffusers are invaluable tools in controlling the lighting and improving the quality of the photos. Reflectors can bounce light back onto the product, reducing shadows and highlighting details that might otherwise be lost. They are particularly useful in scenarios where the light source is unidirectional. Diffusers, on the other hand, are used to soften the light, ensuring that it envelops the product evenly without creating harsh shadows. This is especially beneficial for products with reflective surfaces or intricate textures, as it helps in capturing the true colours and details without distortion.

Standard 3-point lighting setup
Efficient product styling is essential for a successful product photoshoot. Products should be grouped by size, colour, or material to streamline the shooting process. Special attention should be given to items requiring intricate setups or delicate handling. Creating a shot list beforehand can aid in organising the sequence of photographs, ensuring that all desired angles and details are captured. This list might include specific features to highlight, angles to shoot from, and special requirements like using props or capturing group shots, individual shots, lifestyle shots, or scale shots. Proper product placement before the camera ensures that each item is presented in the best possible light, literally and figuratively. Items such as these prop cubes can be essential to presenting the product.

product photography prop cubes
When executing the product photo shoot, the first step is to set the camera to manual mode to have full control over the exposure settings. For product photography, it's crucial to capture the true essence of the product with authenticity. Start by setting the ISO between 100 and 200 to ensure the images are as clear and noise-free as possible. The aperture should be set between f/7.1 and f/16, which helps achieve a sharp focus across the entire product. A slow shutter speed, such as 1/13, is ideal when using a tripod to avoid any camera shake. Shooting in RAW format is recommended as it captures images in the highest resolution, which is beneficial for post-processing. By carefully adjusting camera settings, mastering lighting techniques, and effectively using reflectors and diffusers, product photographers can create visually captivating product images that are both true to the product's appearance and appealing to potential customers. Initially, you must experiment with lighting, angles and camera settings.
When possible, I always shoot with a “tethered” connection to my laptop or desktop computer so that each image I take is automatically imported into Adobe Lightroom. I can see the image within seconds of taking it on a large screen, with all the potential issues I need to resolve before settling on a fixed arrangement to shoot all the products consistently.

Tether Tools
Post-production begins with basic edits, which set the foundation for high-quality product images. Adjusting brightness and exposure is crucial, as these elements define the image's clarity and detail. Photographers should start by correcting any brightness issues to ensure the product is well-lit and inviting. Exposure adjustments are equally important; they help balance light and dark areas, which is essential for product shots that often need to highlight specific features or textures.
Adjusting the white balance is another fundamental step. This process ensures the colors in the images are true to life, which is particularly important in ecommerce product photography, where visual accuracy can influence buyer decisions. Simple tools like the Spot Healing Brush in Adobe Lightroom are invaluable for removing minor imperfections such as dust or scratches, ensuring the product looks pristine.
Selective colour correction adjustments are also crucial, especially when dealing with products that come in multiple colour options. Tools like Hue/Saturation adjustments allow precise control over colour intensity and can be used to tweak the product's appearance to match its real-life counterpart.
Maintaining consistency across all product images is key to professional product photography. This can be achieved by using presets, which save time and ensure uniformity. Once a satisfactory edit has been achieved, saving these settings as a preset in Lightroom allows the product photographer to apply the same adjustments to a series of images, ensuring that all product photos have a consistent look and feel. This consistency helps build brand trust and improves customer experience, as it provides a reliable and predictable online shopping environment.
Using a consistent backdrop, like a white background, and maintaining the same lighting setup for all photos are also critical for consistency. These elements help ensure that the products are the focal point of the images, free from distracting elements or varying colours that could mislead customers.
By employing these post-production product photography tips and tricks, photographers can greatly enhance their product photos' appeal, making them more attractive and more effective in driving e-commerce success.
To elevate one's product photography, experimenting with various camera angles is essential. By utilizing six distinct photography angles, photographers can enhance the visual appeal and storytelling of their product images, thereby boosting e-commerce sales. These angles include the front angle, back angle, the 45-degree view or diagonal composition, top shot, and macro shot. Each angle serves a unique purpose and highlights different aspects of a product, making it crucial to choose the right angle based on the product's design and key features. For instance, the front-angle view is most commonly used and ideal for showcasing essential characteristics, while macro shots are perfect for emphasizing detailed branded details and unique features.

commercial product photography
Gaining insights from professionals can significantly advance one's skills in product photography and commercial photography opportunities. Observing and analysing the work of influential still-life photographers provides valuable lessons in composition, lighting, and styling. Additionally, enrolling in a comprehensive course designed to master the technical and artistic aspects of capturing professional-grade product shots is highly beneficial. Such courses often cover essential camera settings, specialist equipment, and the nuances of working with different materials and textures. Under expert guidance, individuals can also engage in practical exercises like conducting their own product photography shoot, which is crucial for hands-on learning and skill refinement.
Continuous practice is key to mastering product photography. Photographers should consistently plan, shoot, and edit photographs, experimenting with different setups and techniques to discover what is product photography and what works best for their specific style and the products they are showcasing. This includes mastering the focus stacking technique, learning how to photograph products with reflections, and using paper crafting techniques to create innovative backdrops and sets. Regularly updating one's knowledge on camera movements, such as incorporating pans to guide the viewer's attention, can add dynamism to product photos. Adjusting lighting setups to maintain consistency across images is also critical, as it ensures a uniform look that enhances brand identity and consumer trust.
As we have journeyed through the fundamentals of establishing a compelling product photography setup, it's evident that the blend of appropriate equipment, meticulous preparation, and creative execution plays a pivotal role in capturing images that not only showcase products in their best light but also drive e-commerce success. Through understanding the importance of high-quality visuals in the online marketplace, selecting the right camera, tripod, and lighting, and embracing the art of post-production, beginners are well-equipped to transcend their initial forays into professional product photography.
Building upon these basics with continual practice, seeking inspiration from seasoned professionals, and experimenting with various photographic techniques will foster an environment of growth and innovation in this field. The journey of mastering product photography is ongoing, with each image captured not just as a testament to the product but also as a reflection of the product photographer's skill, creativity, and dedication to excellence. As such, the significance of best product photography in strengthening brand identity and enhancing online consumer experiences cannot be overstated, underscoring its essential role in the thriving landscape of e-commerce.
1. What basic equipment do I need to start with product photography?
Answer: To get started with product photography, you'll need a camera (DSLR or mirrorless is ideal, but modern smartphones can work too), a tripod for stability, good lighting (natural light, softboxes, or ring lights), a backdrop (paper or cloth), and basic editing software to enhance your images.
2. How important is lighting in product photography?
Answer: Lighting is crucial in product photography as it affects the colour, clarity, and overall look of your images. Soft, diffused lighting helps eliminate harsh shadows and highlights, making your products look their best. If natural light isn’t an option, consider using softboxes or LED lights for better control.
3. What kind of backdrop should I use for product photography?
Answer: The backdrop you choose should complement the product without distracting from it. Neutral colours like white, grey, or black are common choices. You can also use coloured or textured backdrops to add more artistic flair or context, depending on your product.
4. How do I focus on the product without distractions?
Answer: To keep the focus on your product, use a shallow depth of field by adjusting your camera settings (aperture). A blurred background and foreground will draw attention to the item. Additionally, maintain tidy surroundings and limit props to only those that enhance the product’s appeal.
5. Should I use props in my product photography?
Answer: Props can add context and enhance the appeal of your product, but they should be used sparingly. Ensure they complement the product and help communicate its use or purpose, but don’t overshadow it.
6. What is the best angle to shoot products from?
Answer: The best angle can vary by product type. For many items, a straight-on shot (90 degrees) works well, while others may benefit from a top-down (flat lay) or side angle. Experimenting with different angles can help showcase the product’s best features.
7. Should I shoot in RAW or JPEG format?
Answer: Shooting in RAW format is recommended for product photography as it retains more detail and allows for greater flexibility during post-processing. JPEGs are smaller and easier to manage, but they lose quality upon editing.
8. How can I achieve consistent results in product photography?
Answer: To ensure consistency, establish a standard setup for your lighting, backdrop, and camera settings. Use the same equipment, maintain consistent distances, and follow a similar editing process for all your images.
9. Do I need any software for editing my product photos?
Answer: Yes, editing software can significantly enhance your product images. Popular options include Adobe Lightroom and Photoshop. There are also free programs like GIMP and online editors like Canva that offer essential editing tools to improve colour, brightness, and contrast.
10. How can I effectively market my product photography?
Answer: To market your product photography, build an online portfolio showcasing your best work. Use social media platforms to share images and engage with potential clients and customers. Consider reaching out to local businesses or online shops to offer your services.
By addressing these FAQs, beginners can gain a clearer understanding of the essentials for setting up a successful product photography shoot.
60 Articles Free to Access — There is generally less than 10 minutes of reading time per module but enough (8-10 hours in total of reading for self-teaching) to get you started on your journey to understanding photography, camera settings, composition, and creating your vision and style. Read, digest, and practise at your own pace.


Alan Ranger
Author Profile
Alan is a professional photographer and tutor with over fifteen years of experience delivering photography education and commercial photography services across the UK.
Alan Ranger's exceptional professional credentials, accredited by the BIPP (British Institute of Professional Photography), have earned him the esteemed status of an approved photography training provider for renowned brands like Jaguar Land Rover. Moreover, he has had the privilege to deliver more than 30 enlightening lectures on photography education at the prestigious Xposure International Photography Festival in the UAE.
In addition, Alan has mentored and taught over 5,000 photography enthusiasts over the last fifteen years. Through his varied service approaches suited to each individual.
Beyond his professional pursuits, Alan has also collaborated with schools to organise photography workshops for children with special needs. By providing them with this platform, he empowers them to express themselves creatively and discover their unique perspectives through a camera lens.
Environmental consciousness is at the core of Alan's business ethos. He takes great pride in adopting green and responsible practices throughout his operations, ensuring that his business and events maintain a carbon-neutral footprint.
In conclusion, Alan Ranger is an expert in his field and a compassionate educator who believes in photography's transformative power. Through his guidance and support, individuals can unlock their creative potential and embark on a journey of self-discovery in the captivating world of photography.