
How to take LONG EXPOSURE photos: A Guide For Beginners
Table of Contents Show
Introduction - how to take long exposure photos
Long exposure photography captures the essence of movement by allowing the camera's sensor to absorb light over an extended period. This technique transforms the ordinary into the extraordinary, creating a realm where time stands still while the world around us is in constant flux.
In this guide, we will explore how to take long exposure photos, mastering its techniques and unleashing your artistic vision. Whether you're a seasoned photographer or a curious beginner, this article will be your trusted companion on an enlightening journey.
The Essence of Long Exposure Photography
At its core, long exposure photography prolongs the camera’s shutter speed to capture an extended period, revealing the unseen and transforming the fleeting into the enduring. It unveils the grace and beauty of movements that often evade the naked eye, such as waves crashing against the shore or the celestial choreography of clouds. Long-exposure photography invites viewers to immerse themselves in a realm where time is fluid, and the ordinary becomes extraordinary.
When to Embrace Long Exposure Photography
While long exposure photography is versatile, certain scenarios are particularly well-suited for this technique. Landscape and seascape imagery offer opportunities to capture mesmerising motion blurs with flowing water, drifting clouds, and swaying foliage. Urban environments provide a surreal juxtaposition between the static and the dynamic with light trails and ghostly figures. Long exposure can also breathe new life into mundane subjects like waterfalls, rivers, and the night sky, revealing their otherworldly beauty.
Essential Gear for Long Exposure Artistry
While the concept of long exposure photography may seem straightforward, executing it flawlessly requires a specific set of gear. Each piece of equipment plays a crucial role in ensuring that your images are sharp, well-exposed, and free from unwanted artifacts.
A Sturdy Tripod
The foundation of any successful long exposure setup is a sturdy tripod. As the camera's shutter remains open for an extended period, even the slightest movement can result in blurred or distorted images. A robust tripod, coupled with a stable surface, ensures that your camera remains motionless throughout the exposure, preserving the sharpness and integrity of your final image.

A Remote Shutter Release
Even the simple act of pressing the shutter button can introduce unwanted camera shake, compromising the clarity of your long exposure shots. To circumvent this issue, a remote shutter release is an indispensable accessory. By triggering the shutter from a distance, you eliminate the risk of camera movement, ensuring tack-sharp results every time.

A Remote Shutter Release
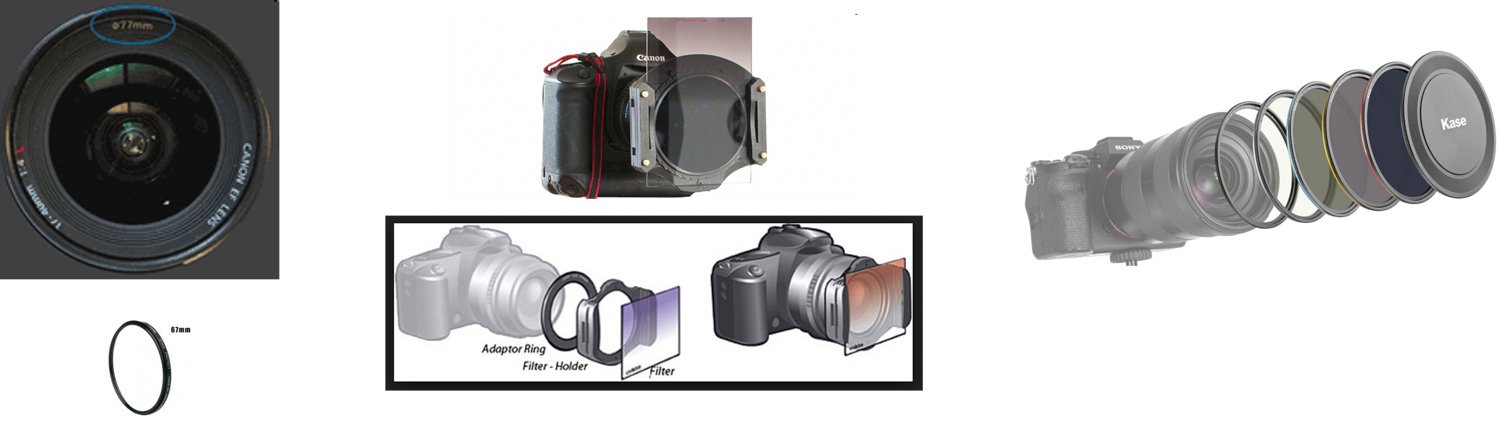
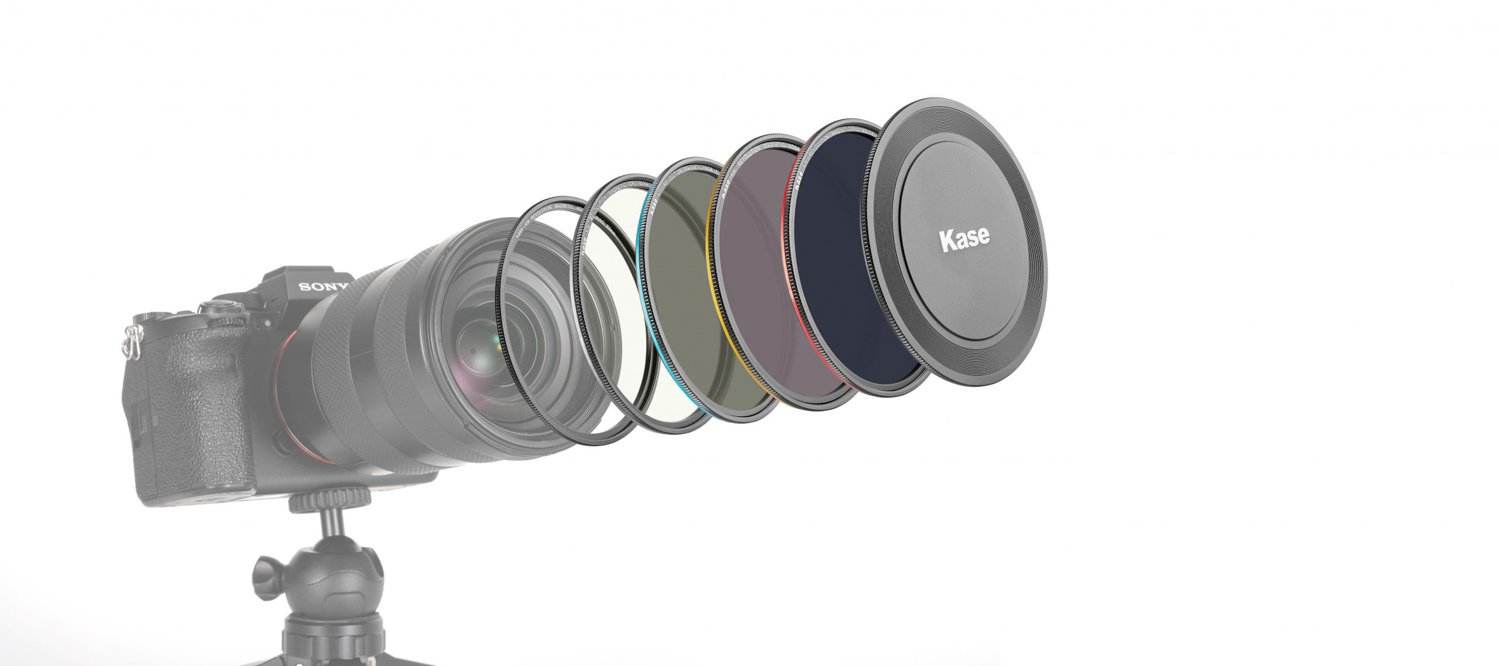
Neutral Density (ND) Filters
In the realm of long exposure photography, neutral density (ND) filters are akin to sunglasses for your camera's lens. These specialised filters reduce the amount of light entering the camera, allowing you to extend the shutter speed without overexposing the image. ND filters come in various strengths, ranging from 3-stop to 10-stop or even higher, providing you with the flexibility to capture a wide range of long exposure effects.
A Sturdy Camera Body and Lens
While any modern camera can be used for long-exposure photography, it's advisable to invest in a sturdy camera body and lens combination. The extended exposure times can magnify even the slightest vibrations, potentially compromising the sharpness of your images. Opting for a robust setup will ensure that your gear can withstand the rigors of long-exposure shooting, delivering consistently sharp and detailed results.
Mastering the Art: A Step-by-Step Guide
Now that you're equipped with the essential gear, it's time to delve into the intricacies of long-exposure photography. By following this step-by-step guide, you'll be well on your way to creating breathtaking images that capture the essence of movement and time.
Step 1: Scout and Compose
The first step in successful long exposure photography is scouting the location and composing the shot. Observe the scene, identify elements for the desired motion blur effect, and note the direction and speed of moving objects. Compose the shot carefully, considering stationary objects and overall frame balance. Long exposure photography requires patience and attention to detail, so take your time to ensure the composition matches your vision.
Step 2: Set Up Your Gear
With your composition in place, it's time to set up your gear. Begin by mounting your camera securely on the tripod, ensuring that it's level and stable. Next, attach any necessary accessories, such as the remote shutter release and filter holder, if you plan to use drop-in filters.
If you're using a digital SLR camera, it's recommended to engage the mirror lock-up function. This feature locks the camera's mirror in the up position, eliminating the risk of vibrations caused by the mirror's movement during the exposure.
Step 3: Dial In Your Settings
Long exposure photography requires precise control over camera settings.
Method 1: Begin by setting the camera to manual mode to adjust aperture, shutter speed, and ISO independently.
Select an aperture value between f/8 and f/16 for landscape shots to maintain depth of field.
Set ISO to the lowest native value (ISO 100 or ISO 200) for better image quality.
Take a test shot at a shutter speed recommended by the camera's light meter. Adjust the shutter speed based on the histogram until the desired result is achieved.
Method 2: Set the exposure mode to Aperture Priority (A or AV). Select your aperture value to achieve the depth of field required and a low ISO (100 or 200) take a test shot and the camera will automatically set the shutter speed based on the metered calculation. Adjust the exposure using exposure compensation to deal with any under or exposed areas showing in the histogram and repeat the test shots until the exposure is perfect.
Step 4: Introduce the ND Filter
Attach the ND filter to the lens or filter holder. Use a filter calculator or app to determine the new shutter speed based on the filter's strength. For example, if the test shot required a shutter speed of 1/60th of a second and a 6-stop ND filter is used, the new shutter speed should be around 1-2 seconds. Read this How to Guide on Using ND Filters. If you are in Aperture Priority exposure mode the camera will adjust the shutter speed automatically all the way up to a maximum exposure time of 30 seconds. Beyond 30 seconds you will need to switch to manual exposure mode and use Bulb and calculate the exposure time manually in your head with an App
Step 5: Switch to Bulb Mode If Requiring longer than 30 second exposure time (Optional)
Engage Bulb mode and use a remote shutter release or cable release to open and close the shutter manually. This method provides you with complete control over the exposure duration, enabling you to capture ultra-long exposures spanning minutes or even hours.
Step 6: Capture the Moment
With your settings dialed in and your gear properly configured, it's time to capture the moment. Use your remote shutter release or cable release to trigger the exposure, and let the magic unfold.
During the exposure, avoid touching or disturbing the camera, as any vibrations can introduce unwanted blur or distortion. If you're shooting in a public area, be mindful of your surroundings and take necessary precautions to ensure the safety of your equipment and those around you.
Step 7: Review and Refine
Once the exposure is complete, review the image on your camera's LCD screen or histogram. Adjust shutter speed or ND filter strength if needed. Repeat until desired result is achieved. Long exposure photography requires patience and experimentation. Embrace the learning curve and refine skills with each experience.
Unleashing Creativity: Techniques and Ideas
While the fundamentals of long exposure photography are relatively straightforward, the true artistry lies in your ability to think creatively and push the boundaries of what's possible. Here are some techniques and ideas to inspire your journey and help you unlock your creative potential.
Capturing Light Trails
One captivating application of long exposure photography is capturing light trails. Whether in an urban or rural setting, the streaks of light created by moving vehicles or celestial bodies can enhance images. To capture light trails, find locations with traffic or a clear view of the night sky. Set up your camera on a tripod and use a shutter speed of several seconds to several minutes for the desired effect. Experiment with angles and compositions for unique and visually striking light trail patterns.

Capturing Light Trails
Embracing Minimalism
Long exposure photography is a powerful tool for embracing minimalism in your imagery. Shoot in urban environments during off-peak hours or in remote natural settings to transform lack of movement into a serene, minimalistic scene. Experiment with long exposures to smooth out water surfaces, blur moving clouds, or create stillness in a bustling environment.

Experimenting with Motion Blur
While long exposure photography can capture smooth motion blur, it can also be used to create dynamic, abstract images by embracing chaotic movement. Look for subjects with erratic or unpredictable motion patterns, like dancers, athletes, or swaying tree branches. Use longer shutter speeds to exaggerate motion blur and create visually striking compositions that challenge perception of time and movement.

Combining Techniques
One of the joys of long exposure photography is combining techniques like light painting, multiple exposures, and intentional camera movement to create unique images. Experiment with different combinations and push the boundaries to transform the ordinary into extraordinary.
Post-Processing Techniques for Long Exposure Artistry
While the magic of long exposure photography often happens in the field, the post-processing stage offers an opportunity to further refine and enhance your images. Here are some post-processing techniques to consider:
Exposure Blending
In some cases, a single long exposure may not be enough to capture the full dynamic range of a scene. Exposure blending (bracketing) is a technique that involves combining multiple exposures of the same scene, each captured at different exposure settings, to create a final image with greater detail and tonal range.
This technique is particularly useful when shooting in high-contrast situations, such as during sunrise or sunset, or when capturing scenes with a wide range of highlights and shadows.
Noise Reduction
Long exposure photography, particularly when shooting at higher ISO settings or in low-light conditions, can introduce unwanted noise or grain to your images. Noise reduction techniques, either in-camera or through post-processing software, can help minimize this noise and improve the overall image quality.
When applying noise reduction, it's important to strike a balance between reducing noise and preserving important details and textures in your image.
Selective Adjustments
Long exposure images often feature a blend of sharp and blurred elements, which can present challenges when it comes to post-processing. Selective adjustments, such as dodging and burning, can help you selectively adjust the exposure, contrast, and overall tonal values of specific areas within your image.
This technique can be particularly useful for enhancing the drama and impact of your long exposure shots, while also ensuring that important details and areas of interest remain properly exposed and visually appealing.
Creative Editing
While post-processing can enhance long exposure images, it's also a powerful tool for unleashing creative vision. Experiment with techniques like color grading, selective coloring, and digital blending to add a personal touch. Remember to balance artistic expression and technical proficiency. Create captivating images that reflect your unique artistic voice and vision.
Conclusion: Embracing the Journey
Long exposure photography requires patience, perseverance, and a willingness to embrace the process. Unlike traditional photography, it demands a mindset that values waiting and observing. To capture the perfect shot, slow down, study the scene, observe subjects' movement, and anticipate their interaction with the environment. This approach fosters a deeper connection with surroundings and offers an opportunity to disconnect from modern life's pace.
Long exposure photography is a journey that captures the essence of movement and time. It transcends traditional photography, demanding patience, perseverance, and an appreciation for fleeting moments. Embrace the process, challenges, and triumphs. Celebrate freezing time and motion in breathtaking images. Cherish stillness and observation for inspiration. Long exposure photography is a deeper way of seeing and engaging with the world. It challenges, inspires, and transforms perception. Let your images be a testament to patience, perseverance, and appreciation for fleeting moments.
FAQs on how to take long exposure photos
Q1: What is long exposure photography?
A1: Long exposure photography is a technique that involves using a longer shutter speed to allow more light to hit the camera sensor. This can create effects such as smooth water, light trails from moving vehicles, or blurred motion of clouds.
Q2: What equipment do I need for long exposure photography?
A2: Basic equipment includes:
A camera (DSLR, mirrorless, or any camera with manual settings)
A sturdy tripod to prevent any movement
A remote shutter release or timer to minimize camera shake
ND (Neutral Density) filters, if you want to take long exposures during the daytime.
Q3: What settings should I use for long exposure photography?
A3: The settings can vary based on the scene, but typically:
Set the camera to manual mode
Use a low ISO (100-200) to minimize noise
Adjust the aperture (f/8 to f/16) to control depth of field and ensure sharpness
Use a slow shutter speed (1 second or longer), adjusting it based on the lighting conditions and desired effect.
Q4: How do I avoid overexposure in bright conditions?
A4: In bright conditions, you can avoid overexposure by:
Using ND filters to reduce the amount of light entering the lens
Choosing a smaller aperture (higher f-stop number)
Shortening the exposure time while still achieving the desired effect.
Q5: How can I create smooth water effects in my long exposure photographs?
A5: To achieve a smooth water effect:
Find a location with water, such as a lake or ocean
Set up your camera on a tripod
Use a slow shutter speed (1/2 second to several seconds) to blur the motion of the water
Use a neutral density filter if it's bright outside.
Q6: Are there any specific times of day that are better for long exposure photography?
A6: While long exposure can be used at any time, many photographers prefer "golden hour" (just after sunrise or before sunset) for softer light. Nighttime is also great for capturing light trails from cars or star trails.
Q7: What are light trails and how can I capture them?
A7: Light trails are streaks of light produced by moving light sources, such as car headlights or stars. To capture them:
Set your camera on a tripod
Use a slow shutter speed (several seconds to minutes, depending on the effect desired)
Aim your camera at a scene with moving lights and press the shutter release.
Q8: Can I take long exposure photos with a smartphone?
A8: Yes, many smartphones have a "long exposure" mode or apps available that allow you to control the shutter speed. Use a tripod or stabilize the phone to minimize shakiness, and experiment with different settings.
Take The FREE Online Photography Crash Course
Free Online Photography Course For Beginners
Join The Alan Ranger Photography Academy
60 Articles Free to Access — There is generally less than 10 minutes of reading time per module but enough (8-10 hours in total of reading for self-teaching) to get you started on your journey to understanding photography, camera settings, composition, and creating your vision and style. Read, digest, and practise at your own pace.
